Creating Panels
Learn how to create custom panels for Django Control Room.
Official Site: djangocontrolroom.com.
Django Control Room is a framework for building Django admin tools, not just a fixed collection of them. Every panel - official or third-party - is a small, independent Python package built on the same public plugin API.
The panel contract lives in dj-control-room-base
dj-control-room (this package) is the hub: it discovers panels via entry points, merges them into a centralized dashboard, and renders the admin sidebar. The base classes you actually subclass - PanelPlugin, PanelConfig, PanelPlaceholderModel, BasePanelAdmin, and panel tools - are provided by the companion dj-control-room-base library, which every panel depends on regardless of whether dj-control-room itself is installed.
This page focuses on how a panel plugs into the dj-control-room hub specifically. For the complete, up-to-date reference on the panel contract itself (settings, CSS, permissions, admin integration, and panel tools for AI/MCP), see dj-control-room-base's Building Panels guide.
Cookiecutter Template (Recommended)
The fastest way to create a new panel is using our official cookiecutter template:
cookiecutter-dj-control-room-plugin
You can find a guide for creating your very first admin panel using this tempalte at: - https://djangocontrolroom.com/guides/create-django-control-room-panel
This template generates a complete, production-ready panel structure with:
- Django admin integration
- Docker Compose development setup
- Test suite with pytest
- Documentation with MkDocs
- Modern Python packaging (
pyproject.toml) - Example project for testing
Using the Template
pip install cookiecutter  # requires cookiecutter>=2.0.0
cookiecutter https://github.com/django-control-room/cookiecutter-dj-control-room-plugin
The template will prompt you for project details and generate everything you need to start building your panel immediately.
Quick Start (Manual Setup)
A panel is a Python package that subclasses PanelPlugin (from dj-control-room-base) and registers itself via an entry point. Your panel will appear in the Control Room dashboard alongside official panels:
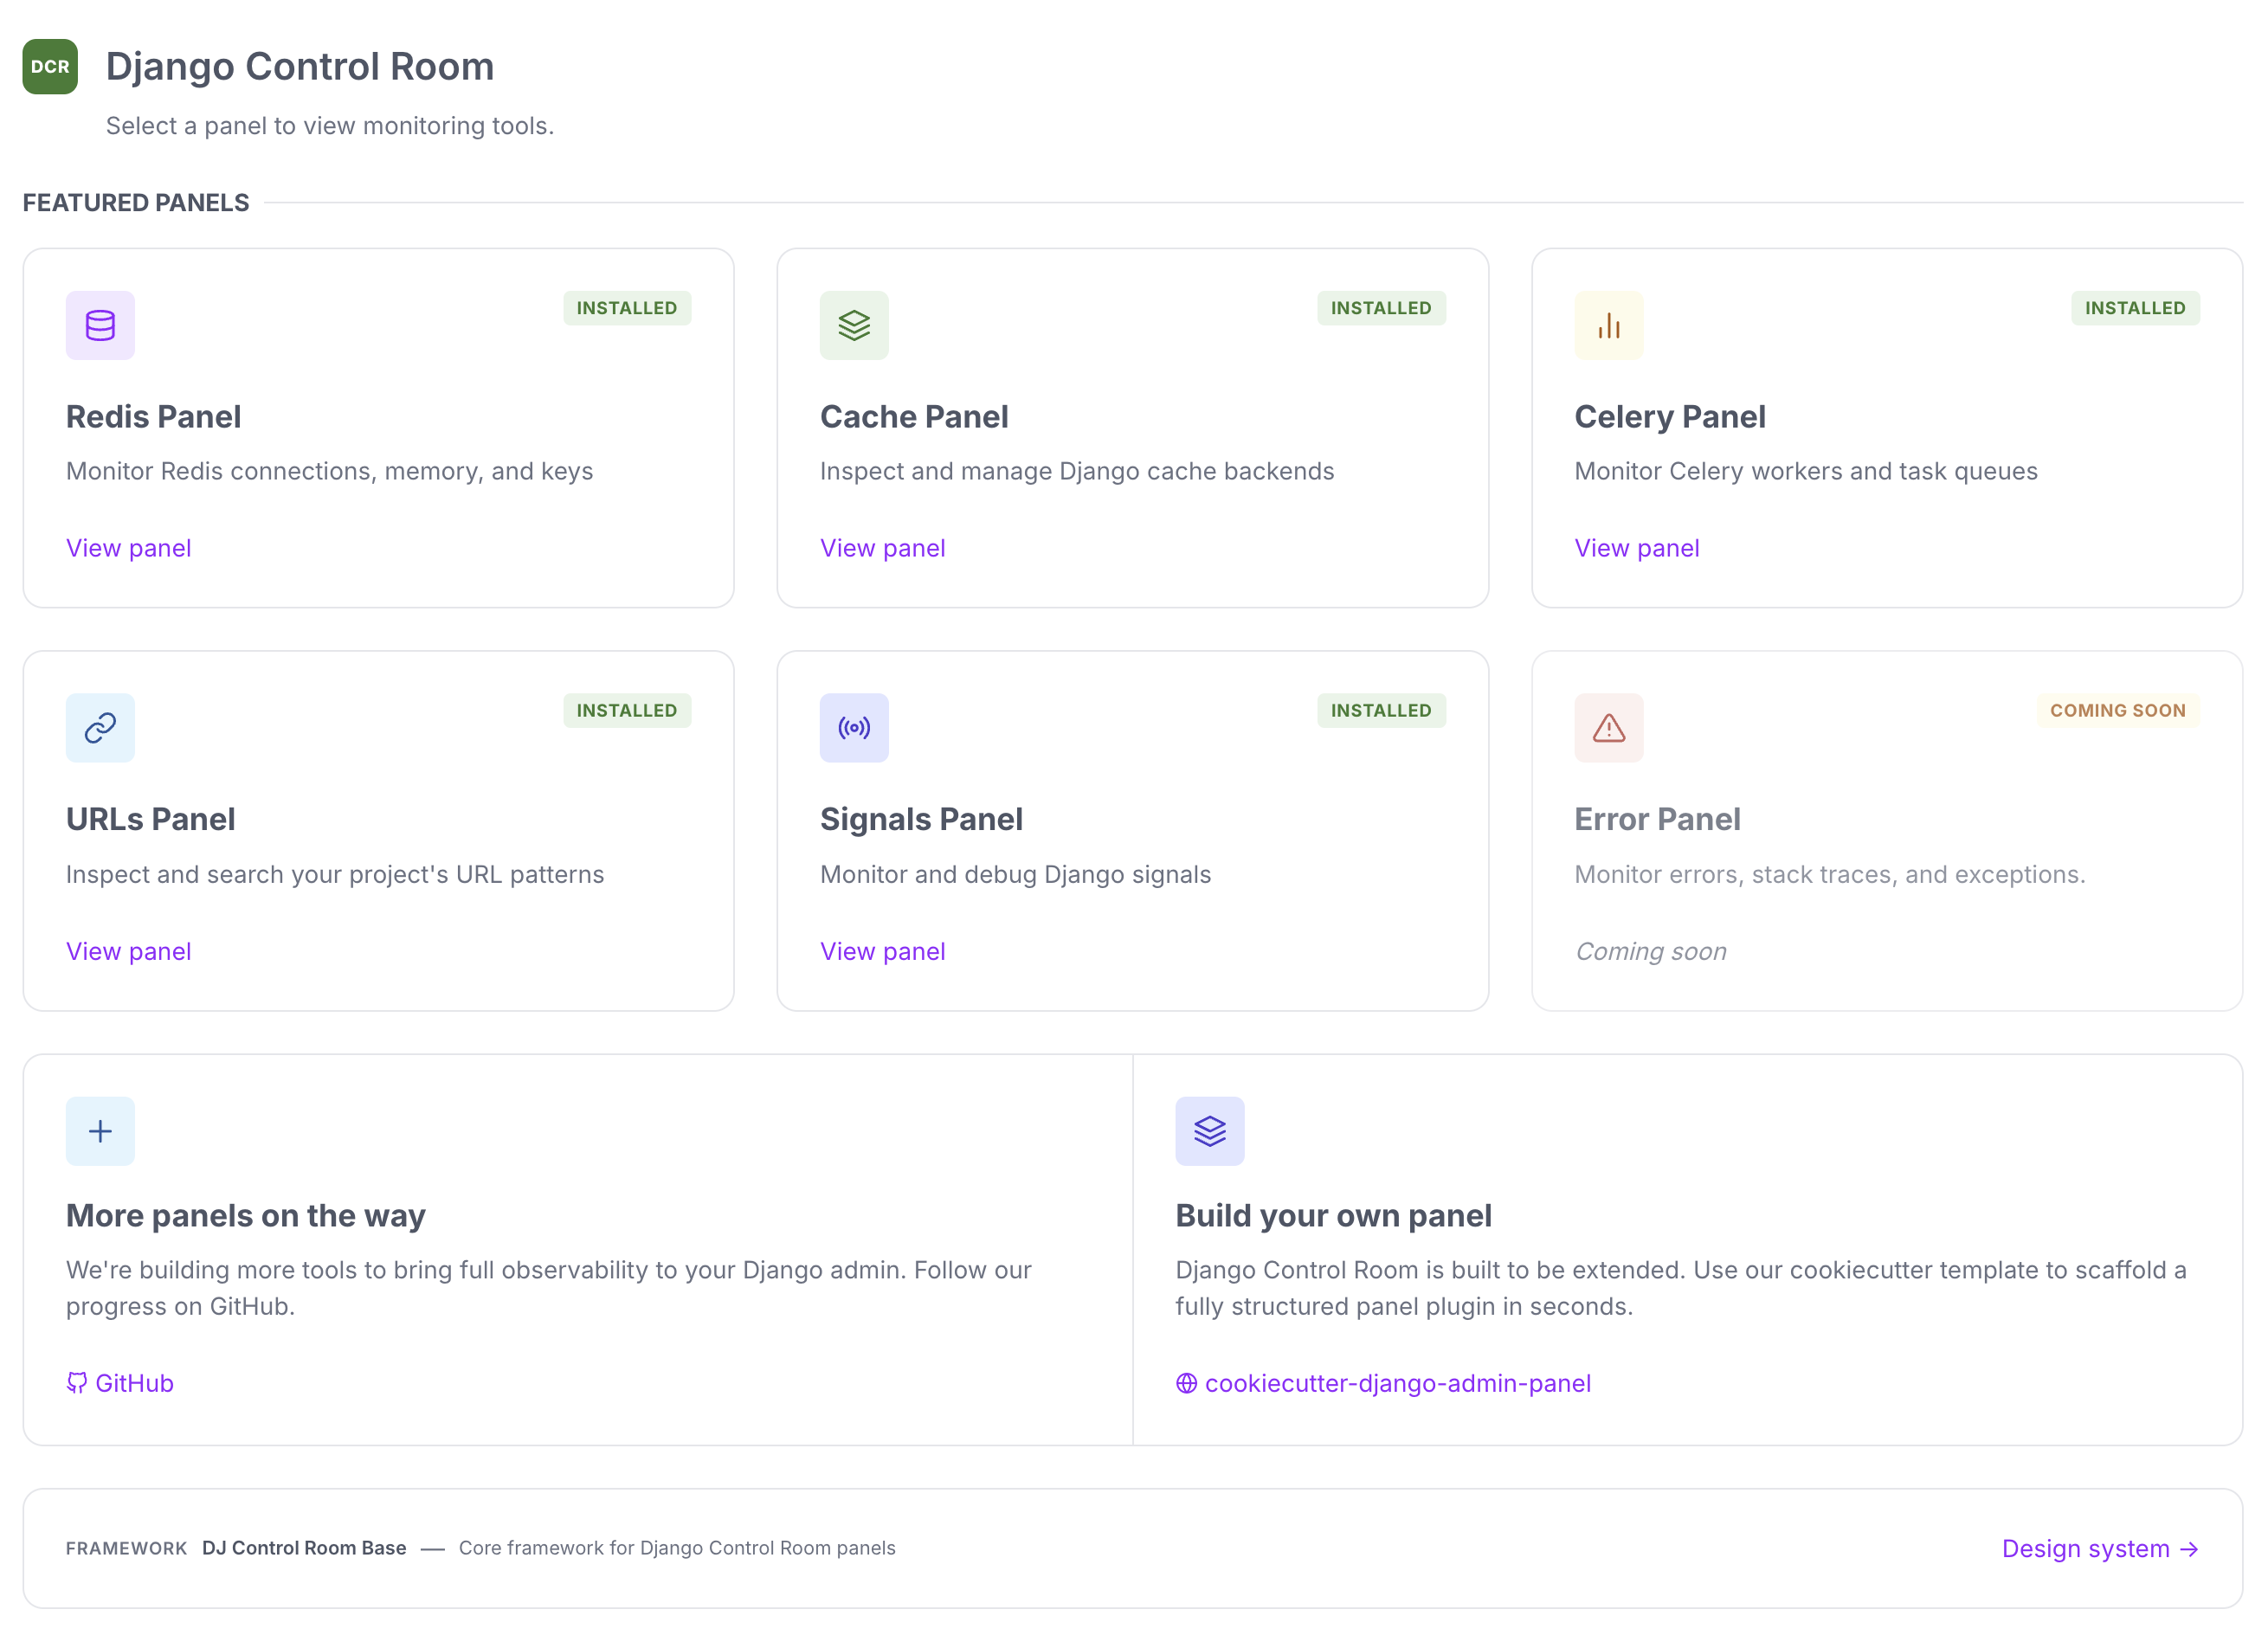
Here's the minimum you need:
# my_panel/panel.py
from dj_control_room_base.core import PanelPlugin

class MyPanel(PanelPlugin):
    name = "My Panel"
    description = "My awesome panel for monitoring X"
    icon = "chart"
# pyproject.toml
[project.entry-points."dj_control_room.panels"]
my_panel = "my_panel.panel:MyPanel"
That's it! Your panel will be automatically discovered by Django Control Room.
The dashboard has three sections:
- Official Panels — curated first-party panels from the hub's list
- Internal Panels — unpackaged apps in this Django project, registered from
AppConfig.ready()(seedcr_startpanelin dj-control-room-base) - Community Panels — other packaged plugins (entry point, or
register()from a third-party install)
A published package cannot appear under Internal Panels. The hub classifies from the entry point and the package's installed distribution, not from a flag on the panel. In code, the official list is still FEATURED_PANELS. Internal panels are the ones with no entry point and no third-party distribution.
Note: A plain class with the same attributes (no
PanelPluginbase) still works for backward compatibility - the hub only checks forname,description, andiconvia duck typing.PanelPluginis recommended for all new panels: it documents the full contract in code, gives you avalidate()helper for tests, and is what every official panel uses.
Panel Interface
Panels should subclass PanelPlugin from dj_control_room_base.core. The essentials are summarized below; see dj-control-room-base's PanelPlugin reference for the exhaustive attribute/method list.
How the Registry ID Works
Django Control Room derives a unique registry key for your panel automatically from your PyPI distribution name (the name field in pyproject.toml), normalizing hyphens to underscores. For example, a package named my-panel gets the registry key my_panel.
This means you never need to declare an id on your panel class — and if you do, it is silently ignored. Two different panel authors can never accidentally clobber each other's panels by picking the same string.
Required Attributes
Every panel must define these three attributes:
name (str)
Display name shown in the Control Room dashboard.
description (str)
Brief description (1-2 sentences) explaining what your panel does.
icon (str)
Icon identifier for visual representation in the dashboard.
Available icons:
- database - Database/storage related
- layers - Caching/stacking related
- link - URL/routing related
- chart - Analytics/monitoring related
- radio - Signals/events related
- cog - Settings/configuration related
Optional Attributes
app_name (str)
The Django app label used in INSTALLED_APPS and as the URL namespace in your urls.py. Defaults to the normalized distribution name (hyphens replaced with underscores), which is typically the same as your Python package name. Only set this explicitly if your app label differs from your dist name.
Django Control Room uses this value to check INSTALLED_APPS and to resolve your panel's URL via reverse(f'{panel.app_name}:{url_name}'). It must match the app_name declared in your urls.py.
package (str)
Your PyPI package name. When set, enables the install/configure page with pip install instructions.
docs_url / pypi_url (str)
Optional links shown on the install/configure page.
icon_color (str)
Color variant for the icon wrap. One of accent, success, warning, danger, info, indigo, purple, muted (default), or their -solid variants (e.g. success-solid). Set to "" for a plain wrap with no background tint - useful when icon is a full-colour logo image rather than a built-in icon key.
features (list[str])
Short, one-line capability statements shown on the panel's install/configure page below the description. Leave empty (the default) to omit the features section entirely.
Optional Methods
get_url_name()
Returns the URL name for your panel's main entry point (defaults to "index").
Django Control Room will resolve your panel's URL using: reverse(f'{panel.app_name}:{url_name}')
Complete Panel Structure
Here's a complete panel package structure:
my-panel/
├── my_panel/
│   ├── __init__.py
│   ├── panel.py          # Panel class (PanelPlugin subclass)
│   ├── conf.py           # PanelConfig instance (settings, CSS, permissions)
│   ├── apps.py           # Django app config
│   ├── models.py         # Placeholder model for admin
│   ├── admin.py          # Admin registration
│   ├── urls.py           # URL patterns
│   ├── views.py          # Views
│   ├── templates/
│   │   └── admin/
│   │       └── my_panel/
│   │           ├── base.html
│   │           └── index.html
│   └── static/
│       └── my_panel/
│           └── css/
│               └── styles.css
├── tests/
├── pyproject.toml
└── README.md
Step-by-Step Guide
1. Create Package Structure
Use the cookiecutter template:
Or manually create the structure shown above.
2. Define Panel Class
Subclass PanelPlugin from dj-control-room-base. This is how your package introduces itself to the hub:
# my_panel/panel.py
from dj_control_room_base.core import PanelPlugin

class MyPanel(PanelPlugin):
    """
    My awesome panel for Django Control Room.
    """

    # Required
    name = "My Panel"
    description = "Monitor and manage XYZ"
    icon = "chart"

    # Optional: only needed if your app label differs from your PyPI dist name
    # app_name = "my_panel"

    # Optional: enables the install/configure page
    # package = "my-panel"

    def get_config(self):
        # Local import so conf.py isn't pulled in during entry-point discovery
        from .conf import panel_config
        return panel_config

    # Optional: customize URL name (defaults to "index")
    def get_url_name(self):
        return "index"
3. Create conf.py
Instantiate a PanelConfig (also from dj-control-room-base). This one object is the single source of truth for your panel's settings, CSS injection, and permission logic — every view and admin entry below reads from it:
# my_panel/conf.py
from dj_control_room_base.core import PanelConfig

panel_config = PanelConfig(
    settings_key="MY_PANEL_SETTINGS",
    defaults={
        "LOAD_DEFAULT_CSS": True,
        "EXTRA_CSS": [],
    },
)
This step is optional in principle - the hub only requires PanelPlugin - but skipping it means writing your own settings, CSS, and permission handling from scratch. Every official panel uses PanelConfig. See dj-control-room-base's Building Panels guide for the full settings/permissions/tools reference.
4. Create Django App Config
# my_panel/apps.py
from django.apps import AppConfig

class MyPanelConfig(AppConfig):
    default_auto_field = 'django.db.models.BigAutoField'
    name = 'my_panel'
    verbose_name = 'My Panel'
5. Define URL Patterns
# my_panel/urls.py
from django.urls import path
from . import views

app_name = 'my_panel'  # Must match panel.app_name (defaults to normalized dist name)

urlpatterns = [
    path('', views.index, name='index'),  # Main entry point
    path('detail/<str:pk>/', views.detail, name='detail'),
]
Important:
app_namein yoururls.pymust match theapp_nameon your panel class (which defaults to the normalized PyPI distribution name). For a package namedmy-panel, both should bemy_panel.
6. Create Views
Use panel_config.get_context() and @panel_config.permission_required() so your views pick up the settings/CSS/permission wiring from step 3 automatically:
# my_panel/views.py
from django.shortcuts import render
from .conf import panel_config

@panel_config.permission_required("index")
def index(request):
    """Main panel view."""
    context = panel_config.get_context(request, title="My Panel")
    # Your data here
    return render(request, 'admin/my_panel/index.html', context)
Skipping
conf.py? Fall back to@staff_member_requiredandadmin.site.each_context(request)for a plain, dependency-free view - you lose per-scope permissions and CSS injection, but it still works.
7. Create Templates
Extend dj_control_room_base/panel_base.html rather than admin/base_site.html directly - it inherits the design system CSS wiring (dj_cr_load_default_css / dj_cr_extra_css from panel_config.get_context()) and Django admin chrome for you:
{# my_panel/templates/admin/my_panel/index.html #}
{% extends "dj_control_room_base/panel_base.html" %}

{% block title %}{{ title }} | My Panel{% endblock %}

{% block content %}
<div class="dcr-page-header">
  <h1 class="dcr-page-header__title">My Panel</h1>
</div>
<div class="module">
    <h2>My Panel Dashboard</h2>
    <p>Your content here</p>
</div>
{% endblock %}
Not using
PanelConfig? You can still extendadmin/base_site.htmldirectly and wire up thetitle/branding/breadcrumbsblocks by hand - see the classic-admin pattern in older panel versions for reference.
8. Add Entry Point
# pyproject.toml
[project.entry-points."dj_control_room.panels"]
my_panel = "my_panel.panel:MyPanel"
9. Create Placeholder Model
Use PanelPlaceholderModel and BasePanelAdmin (both from dj-control-room-base) to register a Django admin sidebar entry with no database table:
# my_panel/models.py
from dj_control_room_base.core import PanelPlaceholderModel

class MyPanelPlaceholder(PanelPlaceholderModel):
    """Placeholder model for admin integration."""

    class Meta(PanelPlaceholderModel.Meta):
        verbose_name = "My Panel"
        verbose_name_plural = "My Panel"
# my_panel/admin.py
from django.contrib import admin
from dj_control_room_base.core import BasePanelAdmin
from .conf import panel_config
from .models import MyPanelPlaceholder

@admin.register(MyPanelPlaceholder)
class MyPanelAdmin(BasePanelAdmin):
    redirect_url_name = "my_panel:index"
    panel_config = panel_config
Attaching panel_config means the sidebar entry respects the same permission rules configured on your panel's settings, instead of the default staff-only check.
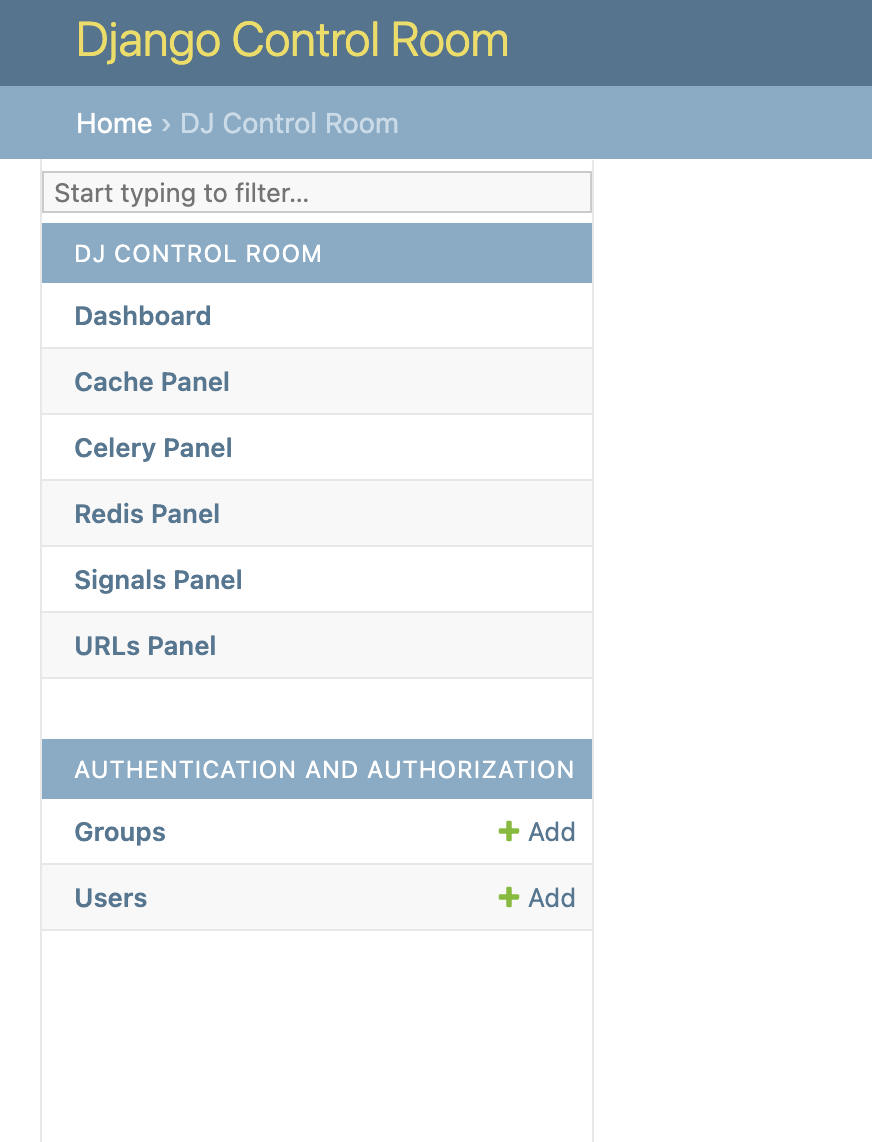
Note: Django Control Room will automatically unregister this placeholder model and replace it with its own proxy model under the "Django Control Room" section (unless configured otherwise).
Once your panel is installed and configured, it will appear in the admin sidebar under Django Control Room:
Publishing Your Panel
1. Complete pyproject.toml
[build-system]
requires = ["setuptools>=61.0", "wheel"]
build-backend = "setuptools.build_meta"

[project]
name = "my-panel"
version = "0.1.0"
description = "My awesome panel for Django Control Room"
readme = "README.md"
license = {text = "MIT"}
authors = [
    {name = "Your Name", email = "you@example.com"},
]
requires-python = ">=3.9"
classifiers = [
    "Framework :: Django",
    "Framework :: Django :: 4.2",
    "Programming Language :: Python :: 3.9",
    "Programming Language :: Python :: 3.10",
    "Programming Language :: Python :: 3.11",
    "Programming Language :: Python :: 3.12",
]
keywords = ["django", "admin", "panel"]
dependencies = [
    "Django>=4.2",
]

[project.entry-points."dj_control_room.panels"]
my_panel = "my_panel.panel:MyPanel"

[project.urls]
Homepage = "https://github.com/yourusername/my-panel"
Documentation = "https://github.com/yourusername/my-panel"
Repository = "https://github.com/yourusername/my-panel"

[tool.setuptools.packages.find]
exclude = ["tests*"]

[tool.setuptools.package-data]
"my_panel" = ["templates/**/*", "static/**/*"]
2. Build Package
3. Publish to PyPI
Best Practices
1. Use PanelConfig for Context and Permissions
Prefer panel_config.get_context(request, ...) and @panel_config.permission_required(scope) (step 6 above) over wiring these up by hand - they stay in sync with your settings automatically and every official panel uses them:
from .conf import panel_config

@panel_config.permission_required("index")
def my_view(request):
    context = panel_config.get_context(request, title="Your Title")
    # Your data
If you're not using PanelConfig, always include Django admin context and require staff manually instead:
from django.contrib.admin.views.decorators import staff_member_required
from django.contrib import admin

@staff_member_required
def my_view(request):
    context = admin.site.each_context(request)
    context.update({'title': 'Your Title'})
    # ...
2. Follow Django Admin Styling
Extend Django admin templates and use admin CSS classes for consistency:
{% extends "admin/base_site.html" %}

<div class="module">
    <h2>Module Title</h2>
    <table class="table">
        <!-- Use admin table styles -->
    </table>
</div>
3. Handle Errors Gracefully
Provide helpful error messages:
try:
    data = fetch_data()
except Exception as e:
    messages.error(request, f"Error fetching data: {e}")
    data = []
4. Document Your Panel
Include comprehensive README with: - Installation instructions - Configuration options - Screenshots - Usage examples
Testing Your Panel
Local Development
-
Install your panel in editable mode:
-
Add to
INSTALLED_APPS: -
Include URLs:
-
Check panel registration:
Write Tests
# tests/test_panel.py
from django.test import TestCase
from my_panel.panel import MyPanel

class PanelTestCase(TestCase):
    def test_panel_attributes(self):
        panel = MyPanel()
        self.assertEqual(panel.name, 'My Panel')
        self.assertTrue(panel.description)
        self.assertTrue(panel.icon)

    def test_url_name(self):
        panel = MyPanel()
        self.assertEqual(panel.get_url_name(), 'index')

    def test_validate_passes(self):
        # PanelPlugin.validate() raises ValueError if a required attribute
        # (name/description/icon) is missing or empty - a quick sanity check.
        MyPanel().validate()
Examples
Check out these official panels for reference:
- dj-redis-panel - Redis monitoring
- dj-cache-panel - Cache inspection
- dj-urls-panel - URL browsing
- dj-signals-panel - Django signals/receivers inspection
Getting Help
Resources
- Cookiecutter Template - Official panel template generator
- djangocontrolroom.com - Tutorials and examples
- dj-control-room-base: Building Panels - The authoritative reference for
PanelPlugin,PanelConfig, admin integration, and panel tools
Next Steps
- Configuration - Learn about available settings
- API Reference - Detailed API documentation
- dj-control-room-base Building Panels guide - Full panel contract reference (settings, CSS, permissions, panel tools)